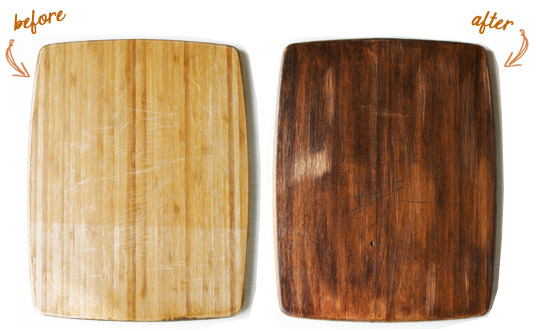
Cutting boards are extremely important to food photography as they give height and warmth to a picture. Unfortunately, most of the ones sold today are made of bamboo which while great for the environment and easy on the average knife show up a yucky yellow in photos which makes food look unappetizing.
Gorgeous vintage cutting boards with scars, texture, and deep colors the camera loves are available for a pretty penny. You can get them online for anywhere from $20 before shipping to over $200. Which is why most of us make our own.
Shawnda at Confections of a Foodie Bride has a wonderful tutorial on how to DIY it from scratch using inexpensive planks from the lumber yard. Her using a small hammer to soften the edges is pure genius.
If your not married to a woodworker with a power saw, you can usually find extremely cheap cutting boards at Goodwill or the Salvation Army. I found 3 different sizes last weekend for 50 cents each. The problem is they were all yucky yellow.
Shawnda also has a nifty solution for prematurely aging a honey-colored cutting board that uses steel wool, vinegar, and tea. The result is beautiful, but it does require letting things sit overnight, and I was looking for a super-speedy solution. Like done-in-10-minutes.
Since I couldn’t find anything online, I (I’m about to show my age here) MacGyvered up my own plan, and it worked perfectly. Here’s how I did it:
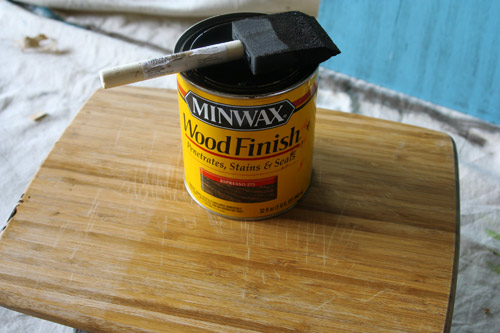
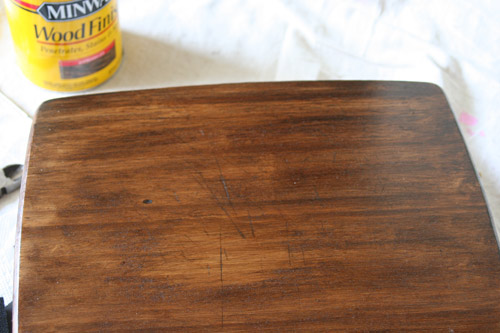
I started by lightly sanding the board to remove the shiny finish. I then, with a 50-cent sponge brush, brushed on a thin layer of dark wood stain ($3 at the local hardware store). I was extra impatient, so I pulled out my hairdryer to hurry things along.
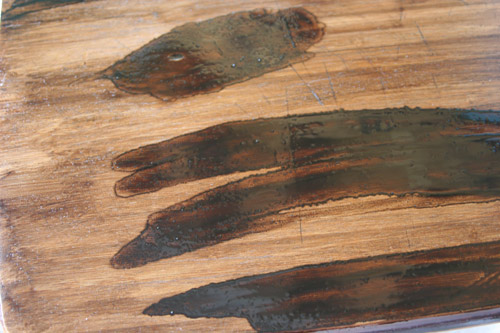
Instead of adding a second coat, I brushed crazy strokes all over the board, let them set without fully drying for couple of minutes, and then wiped them off with a paper towel. (Fair warning — the wood stain is super sticky if it gets on your hands. I could have worn gloves, but I was too lazy to look for any.)
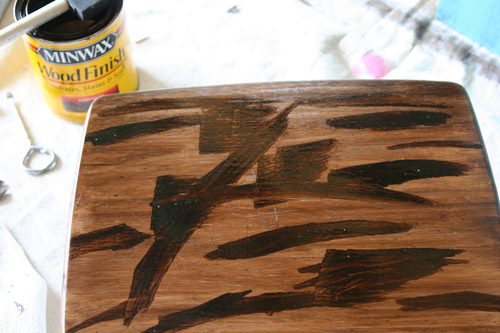
Wiping away the streaks left the board lighter in places, but gave me great texture on the edges, so I did it again.
With the help of my friend Hairdryer, and a couple new scuff marks from my other friend Sander, I had this in just about 15 minutes. And I was happy.
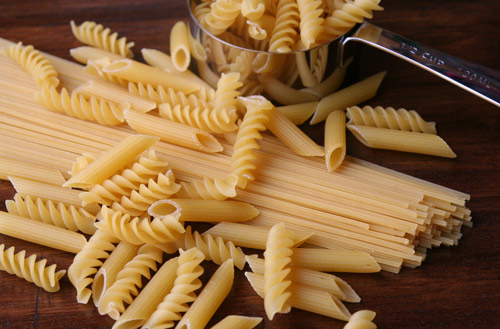
It was still a tiny bit sticky, I’ll admit, but I was desperate to get a certain photo so I could finish a blog posting, so I immediately put it to work. If you’re going to put finished food directly on the surface, you might want to use a food-safe finishing wax and allow it dry thoroughly overnight. But sometimes the food you want to photograph won’t wait. I was only taking a photo of dry pasta, and was delighted to get this and get back to my computer in no time.
March 9, 2015 at 7:42 am
Hi, I think your site might be having browser compatibility issues.
When I look at your website in Opera, it looks fine but when opening
in Internet Explorer, it has some overlapping. I just wanted
to give you a quick heads up! Other then that, excellent blog!
December 8, 2015 at 12:53 pm
thanks for how to. want to make some antique looking ones myself and that is how I found you.
blessings
Barb
PS thanks for other links too. checking those out.